https://www.onetransistor.eu/2017/11/stm32-bluepill-arduino-ide.html#no-bootloader
Linux
ST offers no GUI tools to program the board from Linux. But, when you downloaded the board with Arduino IDE, you also downloaded the tools to program the board using ST-Link adapter. In your home folder, open hidden .arduino15 folder (nautilus ~/.arduino15). Browse to packages/stm32duino/tools/stm32tools. Here you will find a folder named like the STM32 package version (i.e. 2017.11.14). Open it, then linux subfolder. There should be an install.sh script here. Run it from terminal with root permissions (sudo ./install.sh). You just installed udev rules for ST-Link and board. It is now recommended to log off then back in or restart computer.
Open again ~/.arduino15/packages/stm32duino/tools/stm32tools/2017.11.14/linux, go to stlink folder. Make sure BOOT0 is set to 1 and run ./st-info --probe. You should see something like this:
Found 1 stlink programmers
 serial: 573f...
openocd: "\x57\x3f\x..."
  flash: 131072 (pagesize: 1024)
   sram: 20480
 chipid: 0x0410
  descr: F1 Medium-density device
This is an indication that everything is OK and you can proceed burning the bootloader with the following command:
./st-flash --reset write ~/Desktop/generic_boot20_pc13.bin 0x8000000
Adjust the command with the correct path to bootloader file. Here is the output of this command:
2017-11-19T12:32:28 INFO src/common.c: Loading device parameters....
2017-11-19T12:32:28 INFO src/common.c: Device connected is: F1 Medium-density device, id 0x20036410
2017-11-19T12:32:28 INFO src/common.c: SRAM size: 0x5000 bytes (20 KiB), Flash: 0x20000 bytes (128 KiB) in pages of 1024 bytes
2017-11-19T12:32:28 INFO src/common.c: Attempting to write 21140 (0x5294) bytes to stm32 address: 134217728 (0x8000000)
Flash page at addr: 0x08005000 erased
2017-11-19T12:32:29 INFO src/common.c: Finished erasing 21 pages of 1024 (0x400) bytes
2017-11-19T12:32:29 INFO src/common.c: Starting Flash write for VL/F0/F3 core id
2017-11-19T12:32:29 INFO src/common.c: Successfully loaded flash loader in sram
 20/20 pages written
2017-11-19T12:32:31 INFO src/common.c: Starting verification of write complete
2017-11-19T12:32:31 INFO src/common.c: Flash written and verified! jolly good!
That’s it. Disconnect the programmer, move BOOT0 back to 0 and connect the board using its USB port.
Here is what happens when you reset (plug in) the board. First the DFU device appears then the USB serial port (/dev/ttyACM0).
[ 1146.407442] usb 7-1: USB disconnect, device number 2
[ 1172.671329] usb 7-1: new full-speed USB device number 3 using uhci_hcd
[ 1173.058344] usb 7-1: New USB device found, idVendor=1eaf, idProduct=0003
[ 1173.058347] usb 7-1: New USB device strings: Mfr=1, Product=2, SerialNumber=3
[ 1173.058349] usb 7-1: Product: Maple 003
[ 1173.058351] usb 7-1: Manufacturer: LeafLabs
[ 1173.058352] usb 7-1: SerialNumber: LLM 003
[ 1173.687380] usb 7-1: USB disconnect, device number 3
[ 1174.407316] usb 7-1: new full-speed USB device number 4 using uhci_hcd
[ 1174.587353] usb 7-1: New USB device found, idVendor=1eaf, idProduct=0004
[ 1174.587357] usb 7-1: New USB device strings: Mfr=1, Product=2, SerialNumber=0
[ 1174.587359] usb 7-1: Product: Maple
[ 1174.587361] usb 7-1: Manufacturer: LeafLabs
[ 1174.628070] cdc_acm 7-1:1.0: ttyACM0: USB ACM device
[ 1174.629510] usbcore: registered new interface driver cdc_acm
[ 1174.629513] cdc_acm: USB Abstract Control Model driver for USB modems and ISDN adapters
Sketches are uploaded while in DFU mode (device 1eaf:0003).
Uploading a sketch
Launch the IDE and choose the board. For a generic „blue pill”, here is the default configuration:
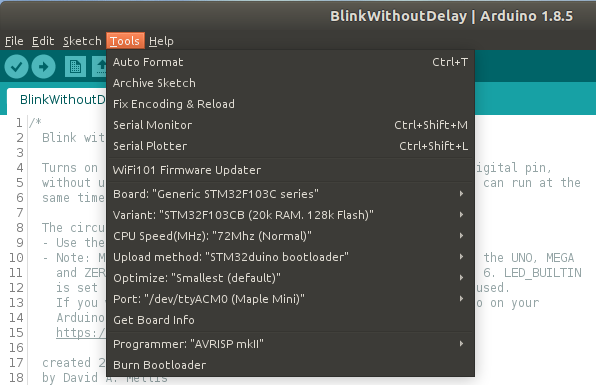
STM32 Generic board in Arduino IDE
On Windows, only the port is different (COMx). Open a sample sketch and compile it. From my experience, on Windows you can just press Upload button to reset the board and burn the sketch binary. But, on Linux I had no luck with automatic reset. I make sure the sketch is compiled then I reset the board by pushing the button and I click quickly on Upload button in Arduino IDE. Otherwise, uploading fails.
This is the output in Arduino IDE:
Sketch uses 13028 bytes (9%) of program storage space. Maximum is 131072 bytes.
Global variables use 2824 bytes (13%) of dynamic memory, leaving 17656 bytes for local variables. Maximum is 20480 bytes.
No valid DFU suffix signature
Warning: File has no DFU suffix
dfu-util 0.7

Copyright 2005-2008 Weston Schmidt, Harald Welte and OpenMoko Inc.
Copyright 2010-2012 Tormod Volden and Stefan Schmidt
This program is Free Software and has ABSOLUTELY NO WARRANTY
Please report bugs to dfu-util@lists.gnumonks.org

Filter on vendor = 0x1eaf product = 0x0003
Opening DFU capable USB device... ID 1eaf:0003
Run-time device DFU version 0110
Found DFU: [1eaf:0003] devnum=0, cfg=1, intf=0, alt=2, name="STM32duino bootloader v1.0  Upload to Flash 0x8002000"
Claiming USB DFU Interface...
Setting Alternate Setting #2 ...
Determining device status: state = dfuIDLE, status = 0
dfuIDLE, continuing
DFU mode device DFU version 0110
Device returned transfer size 1024
bytes_per_hash=260
Copying data from PC to DFU device
Starting download: [##################################################] finished!
state(8) = dfuMANIFEST-WAIT-RESET, status(0) = No error condition is present
Done!
Resetting USB to switch back to runtime mode
Waiting for /dev/ttyACM0 serial...Done
If dfu-util reports no DFU devices, you didn’t reset the board at the right time. This means sketch was not uploaded to board. The Linux issues seems to be related to driver implementation because shortly after a failed upload (without reset), dmesg reports a failure to set dtr/rts on ttyACM0.
Without bootloader
If this method of uploading a sketch (using the bootloader) is a pain, there are alternatives. I regularly use the ST-Link programmer to upload Arduino sketches to blue pill. No need to manually reset the board, no need to move jumpers. Uploading is faster on Linux than on Windows (I don’t know why).
On very rare occasions uploading fails. In this situation I have to move BOOT0 jumper to 1 and upload the sketch. Binaries do not run when BOOT0 is set to 1 therefore I move it back. There are also very rare occasions when blue pill does not reset after upload. I have to push the reset button.

Configure blue pill in Arduino IDE for ST-Link
Programming port of the blue pill has only 3.3V supply. This can be regarded as a good thing, because 5V won’t be available on 5V pin so you can be sure you won’t supply 5V to a non tolerant pin. But, if you fit the blue pill on the breadboard it’s easy to get a 5V supply line from ST-Link using a jumper wire (if you really need it).
Using Arduino IDE with STM32duino bootloader to program the „blue pill” development board isn’t the most effective way to develop STM32 based systems, but it’s easier than with other development kits. It’s recommended to read the API differences and have a look at examples if you will use this method.